Without a soil analysis, it's nearly impossible to tell what your soil needs to help your crop grow. A laboratory soil analysis, or a soil test, provides information on the capacity of your soil to supply adequate nutrients. This helps you select the correct mix of fertilizer and liming materials, which can help you to develop and maintain your soil and increase crop production.
The following recommendations are based on fertilizer experiments, soil surveys, and results obtained from on-farm trials.
Why should I collect a soil sample?
A soil sample can help:
- Establish baseline soil nutrient status for new landowners
- Determine nutrient application recommendations
- Assess pH and the need for liming
- Measure change in soil nutrient status over time
- Document soil nutrient management for certification requirements
- Avoid excessive nutrient applications or soluble salt accumulation
- Develop a plan for possible variable-rate fertilizing within a field
When should I collect my soil sample?
For annual crops, such as vegetables, test soils when you first cultivate a field or change crops or rotations. If you plant successive crops in a single season, you don’t need to test before each planting.
For perennial crops, such as orchards, tree plantations, alfalfa, grass seed, and permanent pasture, the most important time to test the soil is before planting so necessary nutrients can be incorporated into the soil. If you plan to compare soil test results with the results of a leaf analysis, take samples in August. For more information about leaf analysis, refer to Leaf Analysis of Nutrient Disorders in Tree Fruit and Small Fruits (FS 118).
In high rainfall areas of western Oregon, soils are likely to be acidic and require periodic liming. Testing these soils in the late summer or fall allows time for these amendments to react with the soil before the following growing season.
How often should I collect a soil sample?
Soils should be analyzed often enough to recognize potential nutrient management issues before they adversely impact plant growth. In general, test every 2 to 3 years for annual crops, pastures, and legumes, and test every 3 to 5 years for Christmas trees, fruit and nut trees, berries, and grapes. Take samples at the same time of year so results are comparable from year to year.
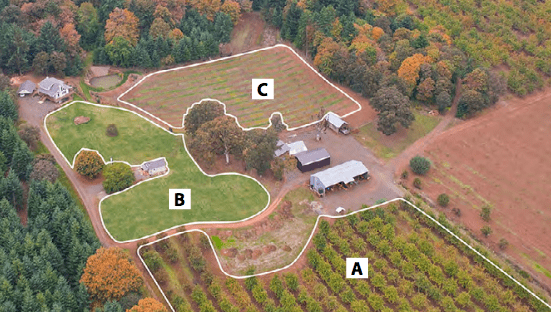
Where should I collect a soil sample?
The area from which to collect a soil sample may depend on the soil type, topography, crops grown, management history, or all of the above. For example, the farm in Figure 1 has three separate sampling areas: A (orchard), B (pasture), and C (vegetable row crops). In this example, a separate soil sample should be collected from each of the three areas. The same concept applies to smaller acreages; for example, a lawn and a vegetable garden should each be sampled separately.
How do I collect my soil sample?
Sample where the crop will be planted
If you are using raised beds, such as for vegetable crops, take your samples in the beds instead of the areas between the beds where there are minimal roots.
Avoid unusual areas
Avoid sampling in small areas where you know that conditions are different from the rest of the field (for example, former manure piles, fertilizer bands, or fence lines). You often can spot these places by looking for plants growing especially well or particularly poorly.
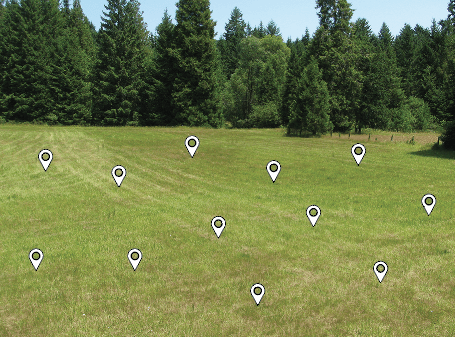
Take 15 to 20 subsamples
Each sample should consist of subsamples taken from 15 to 20 locations within the sampling area (Figure 2).
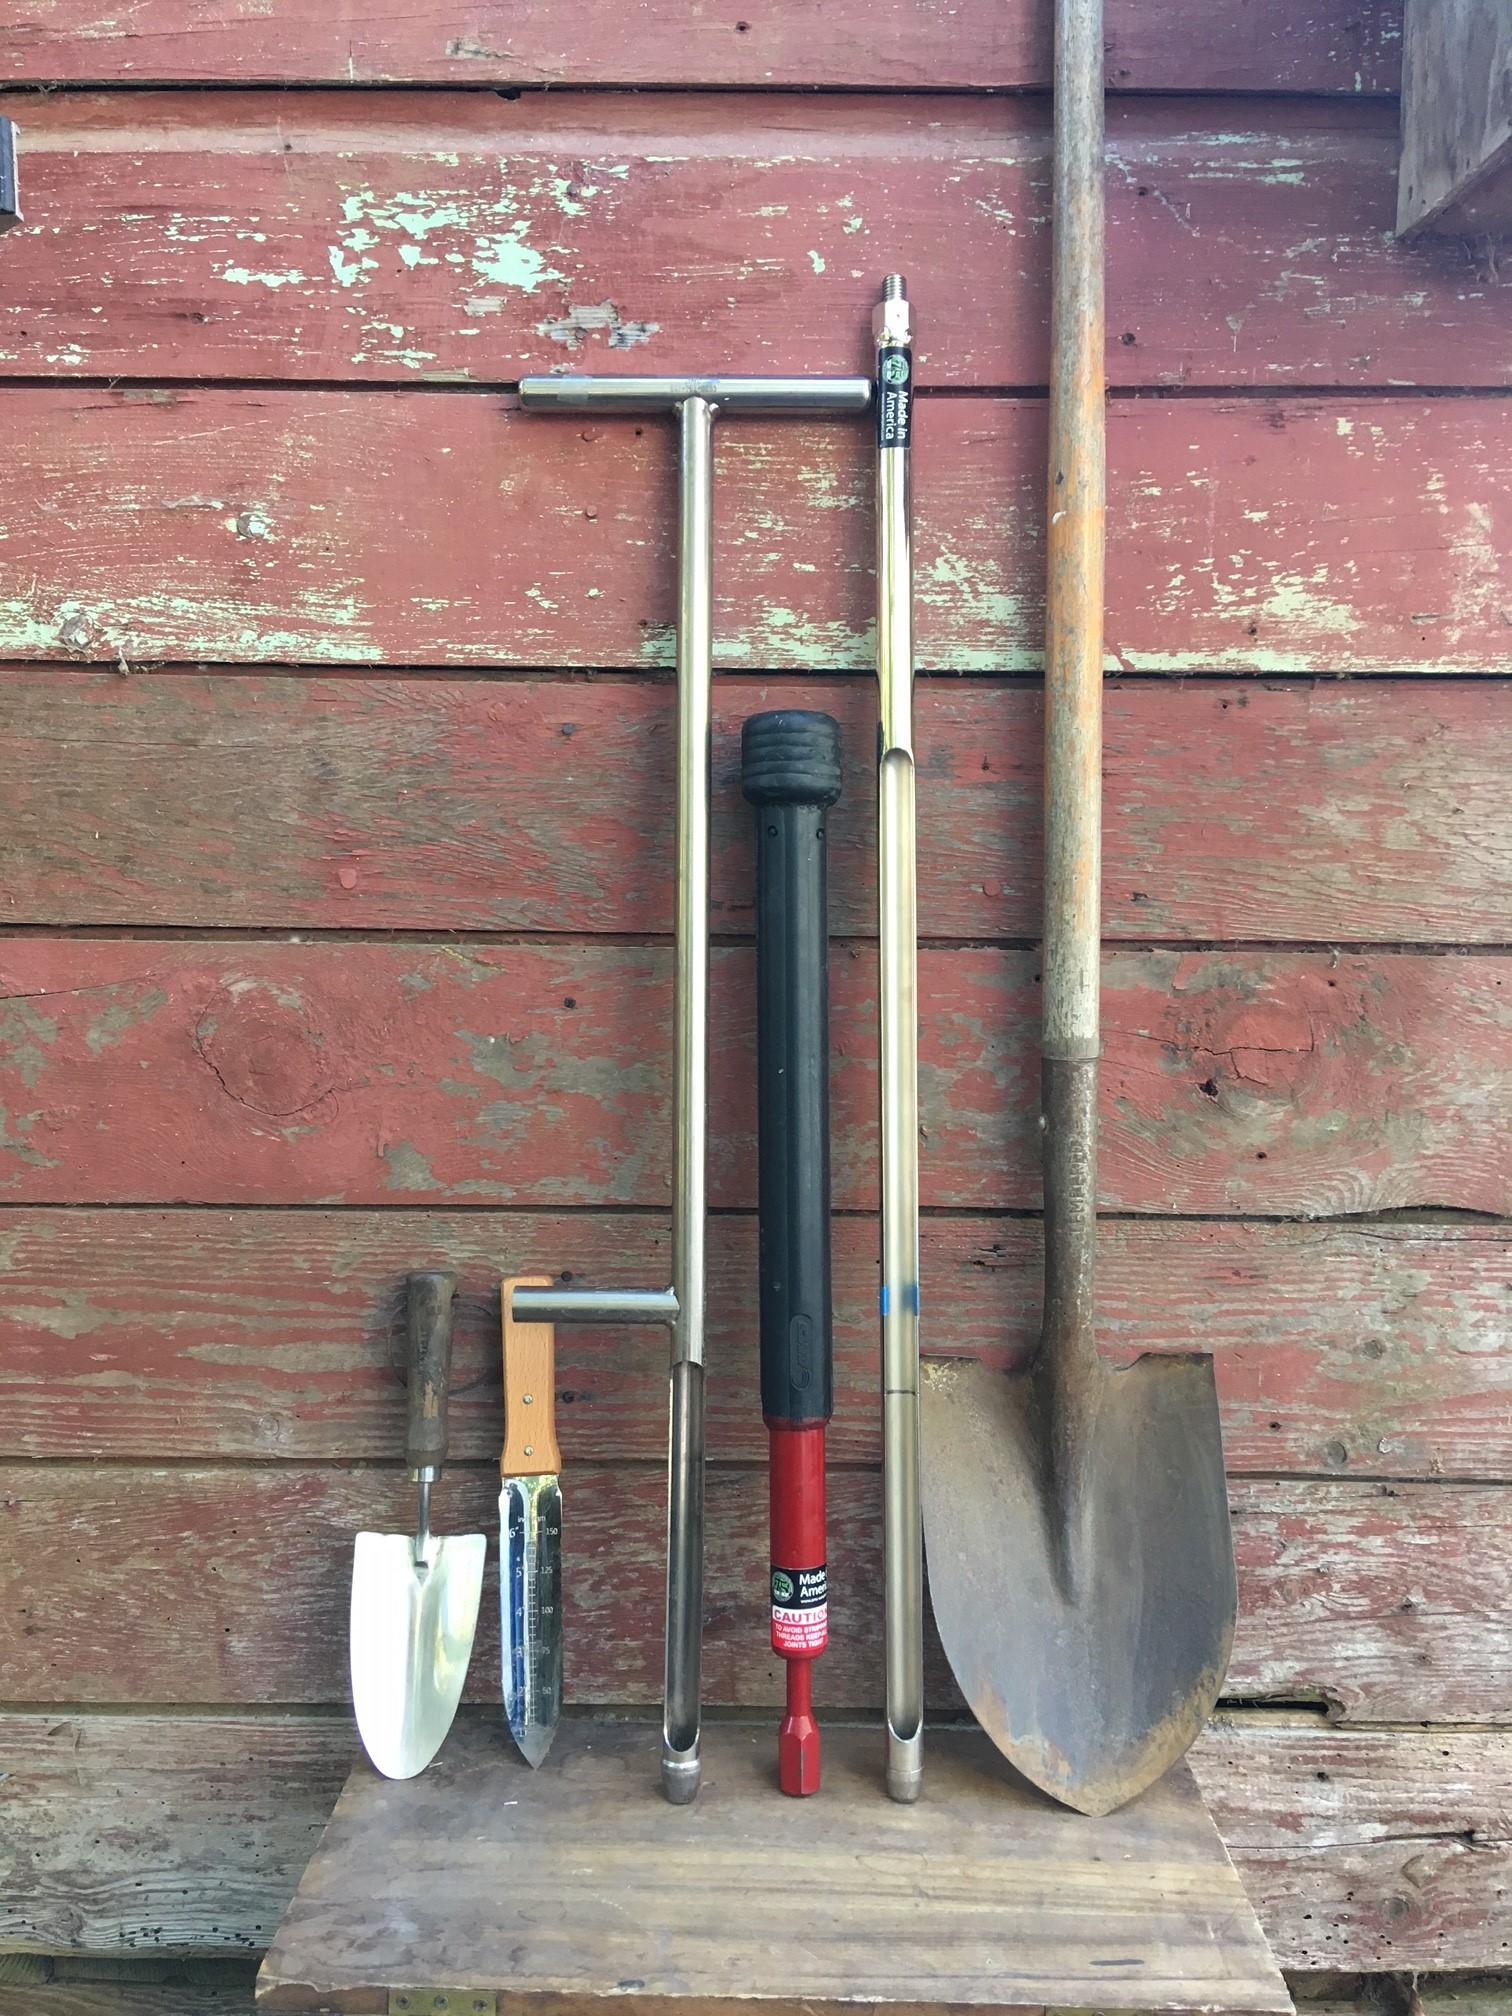
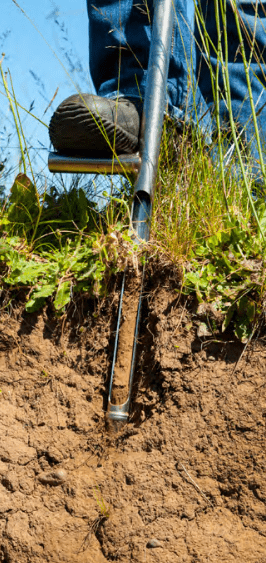
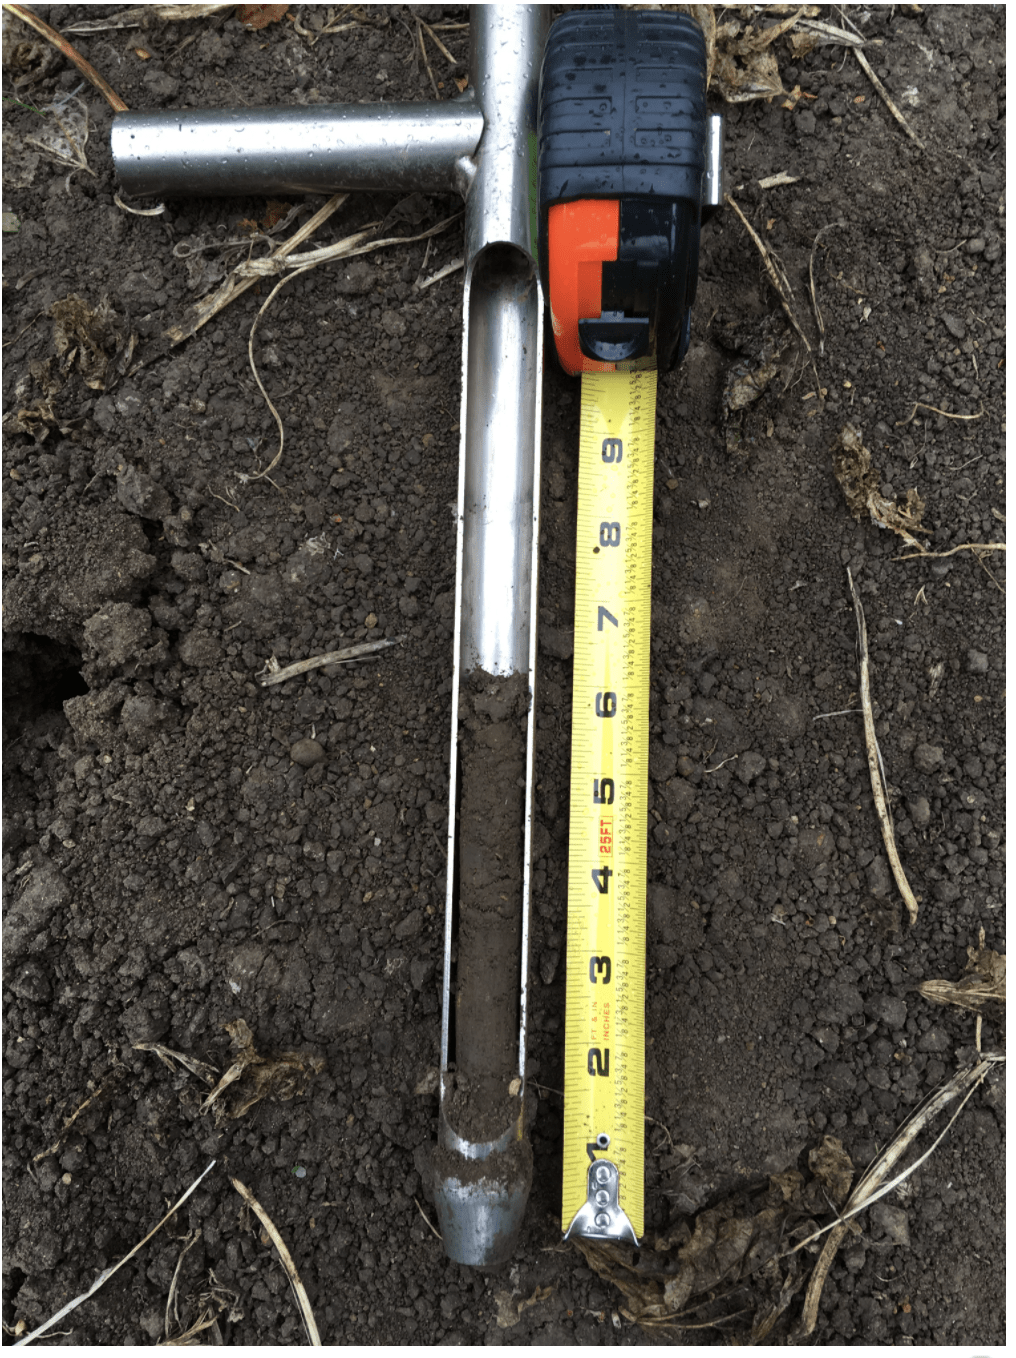
Use appropriate tools
Use a soil probe (Figure 3) for ease and consistency of sampling. If a soil probe is not readily available, a shovel will work.
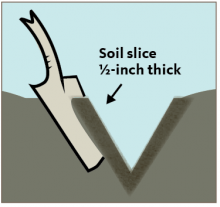
To use a shovel, begin by pushing the blade into the soil at an angle to the desired depth (see “Take the soil sample to the correct depth”). You can make a mark on the shovel with a piece of tape as a guide for consistent sampling depth. Next, tilt the shovel back to remove the blade full of soil, being careful to keep the soil intact. At this point, one option is to use your hands or a trowel to remove excess soil from the shovel to arrive at a subsample with approximately equal amounts of soil across all depths. Another option is to use a trowel to remove a thin slice from the face left behind in the soil by the shovel (Figure 4).
Avoid contaminating the sample
- Use clean sampling tools, and avoid contaminating the sample during mixing or packaging. A small amount of fertilizer residue on tools or hands, for instance, can cause serious contamination of the soil sample.
- Do not include mulch or vegetation in the sample.
- Do not use galvanized metal, brass, or bronze tools to collect samples that will be tested for micronutrients, such as zinc.
Take the soil sample to the correct depth
Sample the part of the soil where the plant roots will grow. For most annual and perennial crops, sample from the surface down to about 6 inches (Figure 5) or to the depth of tillage.
For perennial crops such as pastures and orchards or other soils that have limited or no tillage, refer to Evaluating Soil Nutrients and pH by Depth (EM 9014), for more information about collecting your soil sample. Soils with limited or no tillage can experience significant pH changes in the top 2 inches resulting from the addition of nitrogen fertilizers and lime. However, those changes may be obscured when samples are collected to a depth greater than 2 inches.
Collect samples at the same depth. For example, if you take initial samples at a 6-inch depth, keep that same depth for all future samples to get a more accurate comparison.
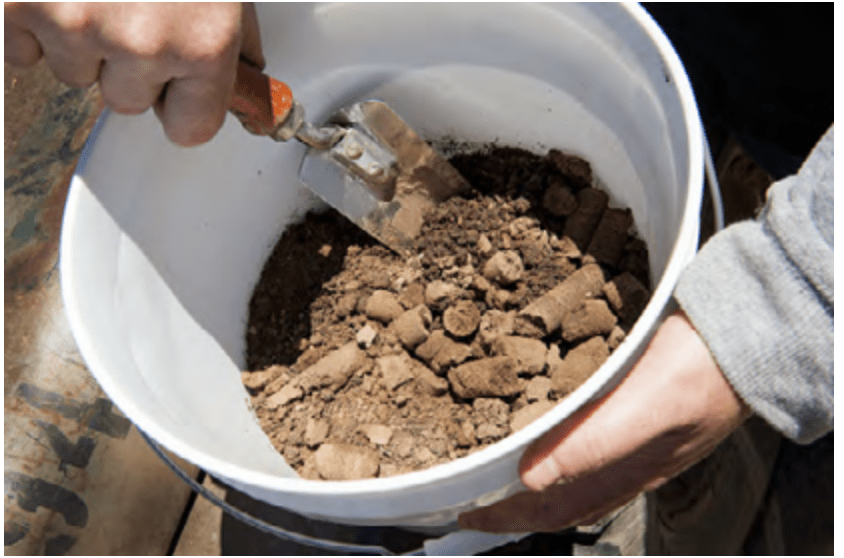
Carefully mix the soil sample
Place all of the soil subsamples from a single sampling area in a clean container and mix thoroughly (Figure 6). Do not worry about breaking the sample up into tiny particles. Labs have soil grinders to further mix the sample.
Analyzing my soil sample
- Refer to Analytical Laboratories Serving Oregon (EM 8677) to find a lab that performs soil analysis. You can search for labs that participate in the North American Proficiency Testing (NAPT) program (EM 8677 includes NAPT-participating and also nonparticipating labs).
- Look for a lab that offers a soil test report that you understand. Labs may charge a fee for providing recommendations based on soil test results.
- Call or check the website of one or more labs to find out the cost of the soil analysis that you need.
- After choosing a lab, request any necessary paperwork (such as an information sheet), and find out how you should prepare and submit the sample.
- Prepare and submit the sample according to the lab’s instructions. Plastic zipper bags work best; do not use a paper bag unless the lab provides one lined with plastic. Most laboratories ask you to label the sample bag with identifying information and to fill out and include an information sheet with the sample. If mailing, don’t forget to include payment in a separate, sealed plastic bag.
- If you are requesting nitrogen tests, keep the sample cool and send it immediately to the lab. However, avoid shipping in the middle of the week if possible, as the sample may arrive over the weekend and may not be processed until the following week.
- For samples that will not be tested for nitrogen, spread the sample out on newspaper to air-dry prior to packaging for shipment.
- You may be able to obtain results sooner if you request to receive results via email. Ask the lab to provide both a printed report and an electronic spreadsheet format for more flexible recordkeeping.
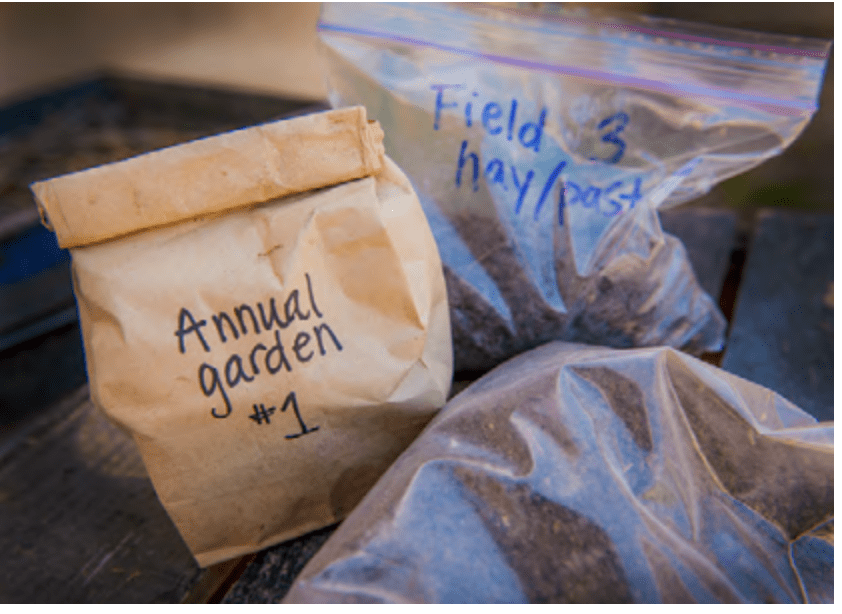
- Number each sample, record sample depth, and keep a record of the fields and areas you sampled. Take a photo of the labeled sample bags before mailing them, for future reference (Figure 7).
What analysis should I request?
- In high rainfall areas of western Oregon, the standard soil analysis includes phosphorus (P), potassium (K), calcium (Ca), magnesium (Mg), soil pH, and SMP buffer pH. Soil pH is a measure of soil acidity, whereas the SMP buffer pH test is used to estimate the amount of lime required to raise the pH of the top 6 inches of soil. Nitrate nitrogen (NO3-N) is sometimes reported in standard soil tests, but is not useful to determine soil fertilizer applications in western Oregon, as nitrate is readily leached from the soil profile. To determine a nitrogen application rate for your crop, consult the specific fertilizer guide (see “Interpreting your soil analysis”).
- In arid regions, such as east of the Cascades, test for phosphorus (P), potassium (K), calcium (Ca), magnesium (Mg), soil pH, soluble salts (measured by electrical conductivity [EC]), sodium (Na), nitrate nitrogen (NO3-N), and sulfate (SO4). Some of these tests may not be part of a standard analysis, so be sure to check with the lab.
- Certain crops might have higher requirements for specific nutrients. Consult OSU Extension publications (see “Resources”) to determine whether you should test for additional nutrients. For example, boron (B) should be included in the analysis for tree fruits, nuts, berries, alfalfa, brassicas, and root crops.
Sampling over time
Once you have researched and selected a laboratory, plan to use the same lab for future tests to keep sample analysis consistent and detect changes in soil nutrients. Also, plan to take your soil sample at the same time of year, same depth, and same approximate field location.
Interpreting your soil analysis
Once you have received the analysis results for your soil, use the following tools to make decisions:
- Soil Test Interpretation Guide (EC 1478)
- OSU Extension Fertilizer and/or Nutrient Management guides. To search for your crop-specific guide, go to the OSU Extension Catalog at and search by keywords (nutrient management guide or fertilizer guide, and crop).
You can also consult your local OSU Extension Service agent.
Resources
- OSU Extension Catalog publications:
- Analytical Laboratories Serving Oregon (EM 8677)
- Applying Lime to Raise Soil pH for Crop Production (Western Oregon) (EM 9057)
- Christmas Tree Nutrient Management Guide (EM 8856)
- Eastern Oregon Liming Guide (EM 9060)
- Evaluating Soil Nutrients and pH by Depth (EM 9014)
- Fertilizing with Manure (PNW 533)
- Fertilizing Your Garden: Vegetables, Fruits, and Ornamentals (EC 1503)
- Leaf Analysis of Nutrient Disorders in Tree Fruit and Small Fruits (FS 118)
- Monitoring Soil Nutrients Using a Management Unit Approach (PNW 570)
- Soil Fertility in Organic Systems: A Guide for Gardeners and Small Acreage Farmers (PNW 646)
- Soil Test Interpretation Guide (EC 1478)
- OSU Vegetable Production Guides
- Western SARE videos on soil sampling methods
- Washington State University Extension publication: Soil Management for Small Farms (EB 1895).
