Absolutely!
Protecting your investment in your plants starts by digging a hole the right size, with the right conditions. If you dig the hole incorrectly, essentially all you do is create a bigger pot for your plant.
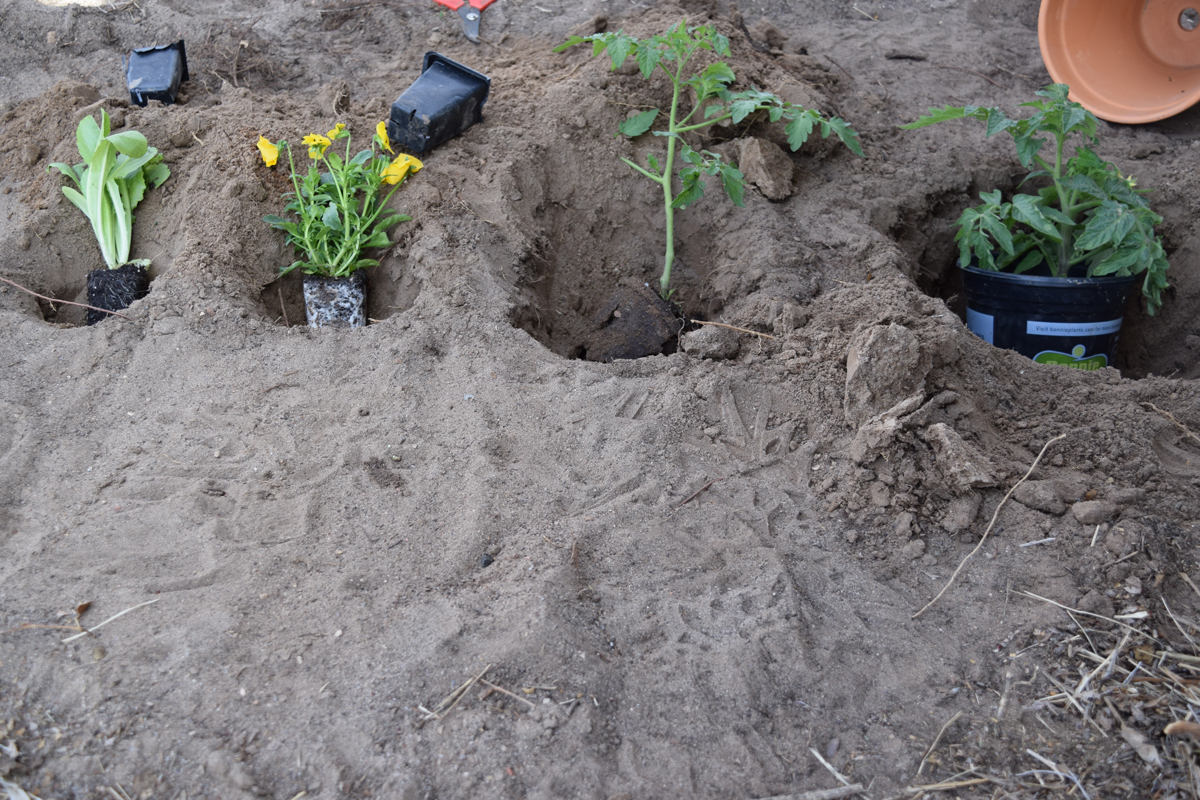
Planting your transplants in the right type of hole can make all the difference in their success. Look at the difference in the same variety of tomato planted in holes prepared in different ways. Which tomato – or shrub or tree – would you prefer to have in your yard?

There are a few things to keep in mind:
- Hole size – depends upon the height of the plant and the size of the pot. As the pots and plants get larger, so does the hole. Smaller plants – 3 inches or less – need a hole 6 to 12 inches deep. Larger garden plants – pots greater than 3 inches, I dig a hole at about twice the diameter of the existing pot and 1.5 to 2 times as deep as I want to plant. You want to make sure you have plenty room for loose soil in the bottom of your hole, so roots thrive.
- Soil conditions – read the label for your new plant. Do the soil conditions required by the plant match your planting location? Perhaps your soil is too sandy. Or, it may have too much clay, and not allow for proper drainage. You’ll want to check that.
- Other plant factors – such as light requirements, space requirements, and even wind, should be considered.
- Loose, un-compacted soil – Perhaps the most important concept for the long term survival of your plant is create a hole in and with un-compacted soil. Plants need water and air to survive. Compacted soils – from heavy equipment, too much foot traffic or many other sources – don’t have large enough soil pores in them. And roots have a very hard time pushing through compacted soils. We can fix this a bit with a good hole, but if the overall area is too compacted, this may stunt growth, and you won’t get the robust plant you hoped for. So, working with a hole of the proper size (check back to step one!), take a trowel or garden spade and starting at the bottom of the hole, push gently into the sides of the hole and pry outward. The soil will break off in small clumps of various sizes. If you look closely at the sides of the hole now, you can see some natural structure and cracks along the sides of the hole. These cracks help air and water movement, and root growth. Do not follow conventional “wisdom” and use your foot to press down the soil after you plant. If you do, you compact the soil, undoing this good work you’ve done. Taking this step to make sure your soil isn’t compacted on the sides of you hole will pay off in future dividends.

- Place your plant in the hole. I use some compost under the plant, to bring the crown just below the surface of the soil. I put the compost into my hole with about half the loose soil, then mix it together. Compost improves soil structure that improves air and water movement, and often increases water availability to plants.
For more information on digging a proper hole, ASA and SSSA have developed two videos. One is shorter, and can be found at https://youtu.be/EHq2CP6Gso4. It quickly describes steps 1 and 4. Another video goes into more depth about many variations regarding the soil that will help your plant investments best succeed. It can be found at http://soils.peachnewmedia.com/store/seminar/seminar.php?seminar=60123. I highly recommend that all serious gardeners and landscapers watch these videos, and help our soil work in the best way possible to support plant growth – and protect those garden center investments!
Answered by Clay Robinson, University of Illinois Urbana-Champaign
To receive notices about future blogs, be sure to subscribe to Soils Matter by clicking on the Follow button on the upper right! Explore more on our webpage About Soils. There you will find more information about Soil Basics, Community Gardens, Green Infrastructure, Green Roofs, Soil Contaminants, materials for Teachers and more.

As a “newby” to gardening, I found this post useful. Thanks!
Thanks, Emily! Be sure to watch the videos Clay made, too. And may you have abundant gardens!
do we also need to cosider the direction to make the direction consistent with the orignal one? For example, the side which is towarding to south should be the same when you plant.
From Clay: Almost all plants grow toward the light, so if an annual plant is leaning a certain direction when you purchase it, that just means it has been facing that direction for a while.If the plant is a tree or shrub, it was likely just placed in the pot on a slight angle. When you plant it, make sure the primary stem or trunk is straight up, in other words, it makes a right angle with the ground. The plant will then grow as well as it has room and light to do so.