Planting a new lawn or renovating an old one can be very frustrating experience if you've never done it before. The key to avoiding frustration is to understand the process well enough to be able to make the right decision. This publication will take you through the steps needed to successfully plant a new lawn or renovate an old one. If you follow these steps, you will get it right the first time!
Seasonal timing
In general, the best time to plant a lawn from seed is when temperatures are favorable for rapid seed germination and grass growth. In the northern part of the United States, grass seed germination is optimum when the air temperature is between 60 and 85F. Try to time your planting so there will be 6 to 8 weeks of good growing weather after seeding.
With that in mind, the period from mid August to mid-September is almost perfect. Days are warm, nights are getting cooler, sunlight is plentiful, and day length is declining. Lawns planted during this period germinate and grow rapidly. You generally can expect to see green grass in a week, followed by the first mowing about 3 weeks after planting. By mid-October, the lawn is dense, and the soil has firmed up, so the possibility of severe rutting or footprinting is reduced.
Late-fall planting are prone to rapid encroachment by wild grasses and broadleaf weeds. If your goal is to produce a dense, clean, pure grass turf, don't take chances on late-fall plantings. If you have no other choice, see "Tips for Beating the Calendar" for some tricks that can improve your chances of success.
There are other times when successful seeding can be done. In many parts of Oregon, the period from early May to approximately mid-June is a pretty good time to plant. Earlier plantings germinate and develop slowly, so there rarely is any advantage to planting early.
Planting later is summer causes many problems. With longer days and high temperatures, it is difficult to keep new plantings wet enough to ensure uniform germination. If you water too much, you might encourage warm-weather disease such as pythium. Once seed germinates, temperatures often are above the range for healthy root growth. The result is grass that requires constant attention all summer. Summer seedings on imported soil often suffer from excess competition from warm-season summer annual grasses, such as barnyardgrass, that arrive as seeds with the soil.
If you really must plant in summer or late fall, see the box at the left for some tips to enhance your chances for success.
What is you decide to plant sod? Sod has the same optimum planting times as seed, but because the grass is mature and has part of its root system, you can get away from planting over a much broader time period. Provided you have a well-prepared sod bed, sod can be planted anytime from about mid-March through mid-November in western Oregon. It can be planted year-round on the coast, and from about April through October in much of central and eastern Oregon, provided irrigation water is available.
Soil preparation
Most people think their soil is terrible. In their minds, it is either too heavy (clay) or too light (sandy). In western Oregon, most people assume their soil is too acid and infertile to grow healthy turf. East of the mountains, people believe their soil is too sandy or too alkaline to grow good turf. Many people assume they must amend their soil with organic matter or haul in new soil to provide a good root zone. It almost sounds like an impossible situation!
Although bringing in topsoil is one solution, it is not always necessary. Most native soils in Oregon have adequate fertility and pH to support turf without doing anything special. A good goal is to use the existing soil whenever possible. See the recommendations for specific regions in the box below.
Recommendations that tell you to apply lime before planting are making assumptions that are not necessarily correct. It is a safe recommendations simply because lime at the rates normally used won't hurt (or help) anything.
Should you have a soil test done before you plant? A soil test is a good idea, but few people bother. Among other things, it takes time to get the soil test report, and then you must interpret it. It probably is wiser to spend your money in fertilizer, unless you have reason to suspect your soil is deficient in one or more elements or has a low pH.
There is more reason for concern with imported soils or when topsoil has been stripped from the site, leaving only subsoil and excavation spoils. Purchased "topsoil" might be real topsoil, river silt, clean fill from a deep pit, or someone's idea of sandy loam. It also could be a synthesized soil made up os sand, organic matter, and soil. Most likely it is clean fill, river silt, or synthetic soil.
Clean fill usually is quite sandy and is easy to spread and grade even in rainy weather. Soil taken from deep pits might not have adequate fertility and can have a higher or lower pH than soil closer to the original surface. On the plus side, it might be relatively free of weed seed. Since it is hard to generalize about purchased soils, the only way to really know their fertility level is to have a soil test done.
If the construction process has left you with subsoil and excavation spoils, there is no way to know the soil's fertility status. Either get a soil test or bring in new soil.
If you really can't work with existing soils, bring in new soil that is as close as possible in texture to the original soil. This allows for continuity in water movement and rooting once the soil is in place. If you bring in sandy soil, place it over the existing soil as a layer rather than tilling it into the existing soil. A layer of sandy soil should be at least 6 inches deep, after compaction, to provide an adequate root zone. Do not till sand into clay soils in an effort to loosen up the soil or improve drainage. Research shows that adding sand reduces soil porosity and increases susceptibility to compaction until the sand content reaches approximately 80 percent by volume. Practically speaking, that means you are better off layering sandy soil on top.
Tilling organic matter into existing soil is a common recommendation. Thoroughly composted organic matter can reduce bulk density of clay soils and increase water- and nutrient-holding capacity of sandy soils. In general, you can expect a short-term improvement in tilth. Some composted materials have significant fertilizer value and will increase soil fertility for several months after incorporation.
In gardens, you can add organic matter annually to maintain the light, fluffy qualities associated with good garden soil. Organic matter added to turf soils probably is less valuable because you can add it only once. After turf is planted, the added organic matter begins to decompose further, and surface soil compaction begins. Two years after planting, it might be difficult to tell that any organic matter was added. Thus, at best, adding organic matter to turf soils has only temporary benefits.
Fresh or noncomposted organic matter can be undesirable. it generally breaks downs rapidly and in the process ties up much of the soil nitrogen that otherwise would be available for the grass. Tilling in fresh sawdust or wood chips generally results in weak, yellow grass.
Another problem with adding organic matter to soil is that if the quantity is greater than 15 percent by volume you might see considerable settlings once the organic matter decomposes. This will leave you with an uneven, bumpy lawn. Lawns where organic matter has been incorporated prior to planting also are often plagued with mushrooms.
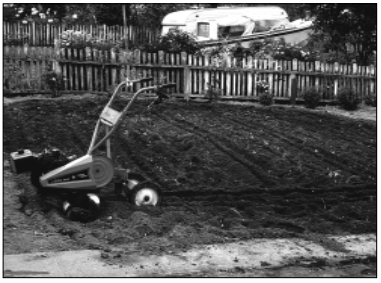
Rototilling
Assuming your existing soil is acceptable for planting your new lawn, the first step normally is rototilling (Figure 1). Rototilling serves two basic functions. First, it loosens the soil to a depth of 6 to 8 inches. Second, it breaks up the soil into smaller pieces so it can be graded.
With those two purposes in mind, it is clear that you need to go over the site only enough times to achieve the depth you want and a clod size you can grade. A common mistake is to pulverize the soil until it looks like powder. This destroys soil structure and ultimately leaves reduced infiltration and increased compaction potential. To avoid this problem, till soil when it is relatively dry, but moist enough that you don’t generate a giant dust cloud. Also avoid tilling wet soil, as doing so creates structureless soil and large, amorphous clods.
If you add compost, till the area once or twice and then add the compost and spread it to a uniform depth. Till the entire area again until a uniform mix is achieved. If you fail to get a good mix, the lawn will have pockets of soil and organic matter along with uniformly mixed soil. This will leave the lawn with wet spots and dry spots, meaning more headaches for you down the road.
If you determine that lime is needed to raise the soil pH, apply it before you till the soil and then till it in thoroughly to achieve a good mix. Remember that lime must react in the soil before it has any impact on soil pH. Applying it after the site is graded and compacted means it will affect only the surface soil and might take a long time to do anything to the rest of the root zone.
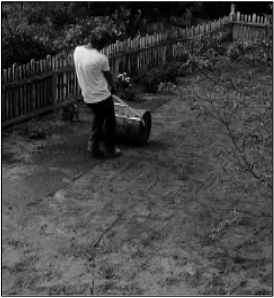
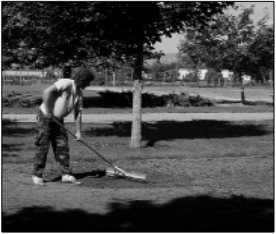
Grading
Once the soil is tilled, start grading by alternating raking and rolling (Figures 2 and 3). Large, lightweight grading rakes, which work better than small garden rakes, can be rented, as can water-filled rollers. Begin with a quick, rough grading aimed at knocking off high spots and filling in low spots. Then start rolling by going over the entire area with a back-and-forth pattern in one direction. As soon as you finish one direction, begin again in another direction. Meanwhile, use the rakes to continue to scratch off high spots and fill low spots.
Do a thorough job around the edges of sidewalks and driveways. It’s a good idea to grade these edges flush with the concrete since they will settle slightly once the area is irrigated regularly.
How do you know when the job is done? Fatigue alters most people’s sense of perception, so when they are really tired the lawn grade looks almost perfect. The goal is to grade the site smooth and have the entire area uniformly compacted so further settling does not occur during establishment (Figure 4). At the same time, you don’t want to pack the soil so hard that roots and water can’t penetrate. Unfortunately, this process can’t be quantified easily, so even if it is your first time, you will have to use your best judgment.
If you need to bring in additional soil, till and rough-grade the existing soil first. Then spread the new soil and follow with the rake-and-roll routine described above. This strategy works whether the new soil is the same as the original soil or is a sandy soil placed over the parent soil.
Selecting the best grass to plant
There are several basic mixtures that are adequate for most situations. The following examples will give you a reasonable chance of success. The percentages of mixture components are not sacred. Be flexible when shopping because every supplier’s mixture is different. Look for mixtures that approximate those described below. Lists of specific cultivars are included at the end of this publication.
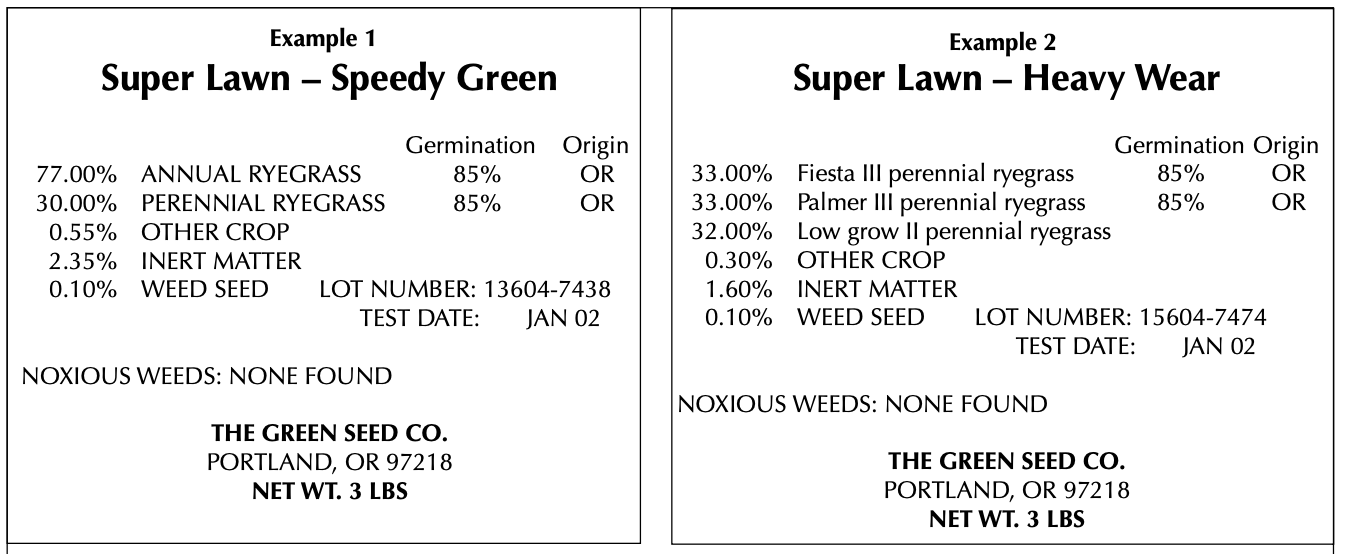
You often can find reasonably good seed mixtures at discount chain stores. Most of these stores sell an elite mixture, an allpurpose mixture, one for shady lawns, and an economy mixture. Most likely, the economy mix is made up predominantly of annual ryegrass, which will die out within a year or two. The all-purpose mixture and shady mix often are pretty good. The elite mixture seldom is better than the all-purpose mix. The key is to study the label and make a decision based on contents, not the price or the hype. To better understand seed labels, see Figure 5.
Some independent nurseries stock improved grass mixtures. These are easy to spot because all of the grasses are listed by name, and the purity generally is high. Unfortunately, not all nurseries sell top-quality grasses. Become familiar enough with improved grasses to know what you are getting
Understanding grass seed labels
All seed labels list the pure seed as percentage by weight of the grasses. In Example 1, there is 77 percent annual ryegrass and 30 percent perennial ryegrass. Notice that neither is identified by a cultivar name, so you have no idea what you are getting. In contrast, Example 2 lists the percentage of three named cultivars of perennial ryegrass. In this case, you know exactly which cultivars are in the mix. If you want a good lawn, buy grass seed that is identified by cultivar. If you want a quality perennial ryegrass lawn, do not buy seed identified as common or Linn.
For each grass in the mix, you will find a germination percentage and a test date indicating when the germination test was done. Germination rates for most cool-season turfgrasses range from 80 to 95 percent. Low germination might indicate a weak cultivar or old, nonviable seed. If grass has not been tested within the past 9 months, the germination percentage might not be accurate. In general, the longer seed is stored, the lower the germination rate.
Other crop indicates the percentage by weight of seeds that are grown as cash crops. They can include undesirable plants such as orchardgrass, redtop bentgrass, or even clover. In general, look for other crop levels below 0.5 percent to avoid contamination of your new turf with undesirable persistent grasses or broadleaf crop plants.
Inert matter includes stems, broken seeds, and other nonliving debris.
Weed seed includes all other seed found in the sample that is not considered pure seed or other crop. It includes seed of plants commonly considered to be weeds. Look for weed seed levels below 0.3 percent in quality mixes.
Each state has its own list of noxious weeds. Noxious weeds are particularly troublesome weeds and may be extremely difficult to control. On the grass seed label, they are listed as the number of seeds per pound. The only acceptable level of noxious weeds is zero.
General tips for buying grass seed
Look for grass mixes with named cultivars (Example 2), high germination percentages, and low weed content. Do not buy grass mixes containing annual ryegrass. Stay away from advertisements that offer the perfect grass that doesn’t require any input. Perfect grass does not exist.
West of the Cascades — sun
Mixture 1
- 70–80 percent perennial ryegrass
- 20–30 percent fine fescue
Mixtures like this start fast and quickly give a functional lawn. They tend to be nitrogen-deficient for the first year or two since they initially are dominated by perennial ryegrass. By the third year, the fine fescues begin to dominate, particularly if you have not fertilized regularly. If the fine fescue is Chewing’s fescue, it often takes over completely. Hard fescue and red fescue are less aggressive. This mix will make a lawn that is rugged, tolerates some shade, initially requires medium to high fertility to look good, and is easy to cut with a power lawnmower set at 11 ⁄2 to 2 inches
With the exception of hard fescue, all perennial ryegrasses and most fine fescues are susceptible to red thread disease. This disease generally is worse under low fertility and where clippings are removed. Red thread is the number one complaint about this mixture. While the disease doesn’t kill the grass, it can make it look bad.
Mixture 2
- 25–50 percent perennial ryegrass
- 50–75 percent Kentucky bluegrass
This mix can look good in western Oregon if you select varieties carefully (see Table 1). Initially, it will look like ryegrass, with the bluegrass showing up in the second or third year. In OSU trials, this mix was stable after 5 years.
Either of these grasses planted alone tends to be invaded quickly by other grasses, which ruins the appearance of the lawn. In a mixture, both grasses seem to hold up better.
You can expect to see red thread disease on the ryegrass and rust disease on the bluegrass. Both of these diseases cause mostly cosmetic damage in the fall and early winter. Neither kills healthy grass. Necrotic ringspot disease can be devastating to bluegrass if you plant susceptible cultivars.
To look its best, this lawn needs medium to high fertility. It thrives on the fertility programs of lawn-care companies. This lawn is for sunny sites only. Plan on mowing at 11 ⁄2 to 2 inches and irrigating regularly. Annual dethatching might be necessary.
Mixture 3
- 50 percent perennial ryegrass
- 25 percent Kentucky bluegrass
- 25 percent fine fescues
This mixture sounds like the answer to everyone’s dreams, but the fine fescues don’t blend well with the bluegrass, and stands often are patchy. Turf quality generally is poorer than simpler mixtures with more compatible grasses. This mix generally is dominated by the fine fescues within 3 years after planting. Mixtures like this are common at both nurseries and discount stores.
Disease problems and cultural requirements are similar to those discussed earlier for mixtures 1 and 2.
Mixture 4
- 75 percent perennial ryegrass or fine fescue
- 25 percent colonial bentgrass
For areas west of the Cascades, this probably is the mix that most homeowners should plant because bentgrass eventually invades and dominates most lawns even if it is not planted. In nature, this takes several years, and during the transition the lawn looks like it has the measles. By starting out with bentgrass, you will have a more uniform lawn immediately.
Advantages include a low fertility requirement and long-term persistence. To look good in summer, this lawn requires frequent irrigation, but its actual water requirement is no different than that of other common grasses.
This mix used to be common, but it is hard to find in the retail trade today. The reason probably is that it does not look good when mowed high with a power lawnmower.
To look its best, this lawn needs to be mowed fairly short (1 ⁄2 to 1 inch with a push mower or no more than 11 ⁄2 inches with a power mower).
This mix generally looks like perennial ryegrass or fine fescue the first year, but by the second or third year it is a bentgrass lawn.
West of the Cascades — shade
Mixture 1
- 70 percent fine fescue
- 30 percent perennial ryegrass
This mix takes advantage of the natural shade tolerance of fine fescues and the rapid establishment of perennial ryegrass. It works quite well, provided that the shaded area isn't wet all the time. If it is, the fescues become riddled with fungal diseases. The ryegrass is useful mostly during the establishment period and then thins out.
This is an easy lawn to maintain with medium to low fertility, occasional irrigation, and mowing at about 2 inches. The fescues do better if the soil is fairly dry and air movement is good.
Mixture 2
- 60 percent fine fescues
- 20 percent perennial ryegrass
- 20 percent rough bluegrass
If your site is both wet and shady, or you irrigate frequently, this mix makes a pretty good lawn. The key component is rough bluegrass, also known as Poa trivialis. This grass grows better in shade than any other grass. It tends to be light green, and it doesn't tolerate drought well. (It turns reddish-brown under drought stress.) It also invades and dominates lawns in sunny areas due to its vigorous growth via stolons (horizontal, spreading shoots).
For attractive turf, mow between 3/4 to 1 and 1/2 inches, water regularly, and provide medium to low fertility. Rough bluegrass will not hold up under traffic (e.g., children).
East of the Cascades — sun
Mixture 1
- 75 percent Kentucky bluegrass
- 25 percent fine fescue or perennial ryegrass
This mix makes a good lawn where the turf is mostly in the sun but there are areas of light shade. Because it is so well adapted, the bluegrass will dominate very quickly, unless fertility levels are very low. As necrotic ringspot disease becomes more common, you probably will see fewer simple mixtures like this one. Look for varieties of bluegrass that are more resistant to necrotic ringspot. To look its best, this lawn needs regular irrigation, medium to high nitrogen fertilization, and regular mowing at 1 and 1/2 to 2 and 1/2 inches.
Mixture 2
- 50 percent perennial ryegrass
- 25 percent Kentucky bluegrass
- 25 percent fine fescue
This mix establishes rapidly and gradually reaches equilibrium among the three grasses. Mixtures like this might be less susceptible to necrotic ringspot disease than straight plantings of Kentucky bluegrass.
Maintenance requirements are similar to the bluegrass–fescue or bluegrass–ryegrass mixtures discussed above. Ryegrass shreds more easily than bluegrass when cut with a power or push lawnmower, so keep your mower blade sharp.
Mixture 3
- 100 percent tall fescue (turf types only)
Expect a deep-rooted, rugged turf from tall fescue. Newer varieties are only slightly coarser than coarse Kentucky bluegrasses. You should be able to wait 5 to 10 days between irrigations if you water deeply. Tall fescue tolerates moderate shade as well as full sun, so it’s an adaptable grass. Fertility requirements are average. Mow at 1 to 21 ⁄2 inches. Tall fescue is a good choice for hot areas such as LaGrande and Medford and is adapted to much of central and eastern Oregon.
East of the Cascades — shade
Mixture 1
- 50 - 75 percent fine fescue
- 25 - 50 percent Kentucky bluegrass
By increasing the percentage of fine fescue, you are assured of a uniform stand of grass in most moderately shady sites. The bluegrass might prosper if the cultivar is shade-tolerant (e.g., Glade) or if there is only partial shade.
If you mow relatively high (2 to 21 ⁄2 inches), keep the fertility in the medium range, and irrigate only as needed, you should have reasonably good turf.
Seeding
The basic goal in planting is to spread seed over the area so grass will germinate uniformly. The best seeding tool is a drop spreader, preferably one that has been calibrated to deliver the proper amount. Most homeowners don’t have access to a calibrated spreader so they have to guess. That is why most how-to guides tell you to divide the seed into two equal quantities and spread half in one direction and the remainder in another. The key is to be sure you cover the entire area at least once.
For the sake of discussion, let’s assume you have a calibrated spreader and you want to know how much seed to apply. If you plant a perennial ryegrass–fine fescue lawn during an optimum planting period, plant a minimum of 5 lb of seed per 1,000 sq ft. For each week later than the optimum period in the fall, increase the seed rate by 2 lb per 1,000 sq ft. The fall optimum in the Willamette Valley is August 15 to September 15, so if you plant on October 1, you should use a minimum of 9 lb of seed per 1,000 sq ft. By October 15, you will need a minimum of 13 lb per 1,000 sq ft.
After October 15, you are wasting your time. In most years, you might get a stand, but chances are it will be weedy and thin, and you might have to start over again the next spring. While increasing the seeding rate can help make up for poor growing conditions, it can do only so much. This concept applies in all areas of Oregon, but the critical planting dates might vary slightly depending on local conditions. Some typical ranges for seeding rates are listed in Table 1.
One way to plant the seed is to walk back and forth over the area with a drop spreader (Figure 6). Make sure you overlap the wheels of the spreader to avoid skips (Figure 7). If you have divided the seed into two equal quantities, go a different direction with the second portion of seed. It’s a good idea to make an extra pass or two where the lawn meets the sidewalk.

Hydroseeding
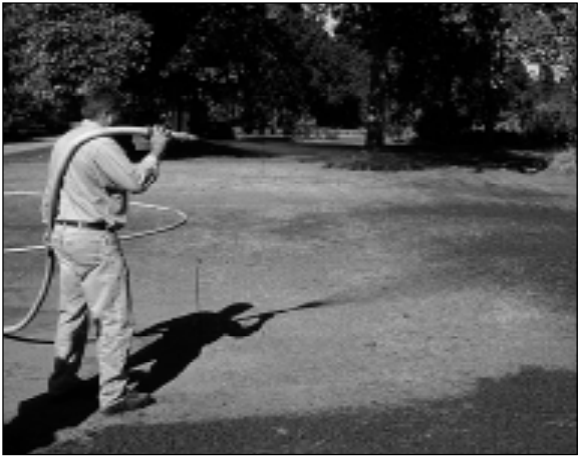
Hydroseeding involves mixing seed, a fiber mulch, fertilizer, and perhaps a tacking agent in a tank of water (Figure 8). This mixture is sprayed through a large hose and nozzle and applied much like paint over the prepared seedbed. This method generally is performed by contractors. It is a very effective way to apply seed and is useful on hilly sites prone to erosion and on windy sites where seed might be blown away. (Sandpines Golf Links near Florence was seeded from tees to greens via hydroseeding because of wind problems.) It is fast and effective on flat, protected sites as well.
Is hydroseeding better than dry seeding? The answer depends on whom you ask. Since the seed is mixed with water, it is well soaked by the time it is applied. The mulch holds moisture around the seed, which gives the seed a head start. Hydroseeded areas can germinate quickly. In the long run, however, there is little difference between dry seeding and hydroseeding if both are taken care of properly during germination and establishment.
Unfortunately, people often assume hydroseeding means they don’t have to babysit their new planting, so they fail to water carefully, which leads to failure. Hydroseeding is just one more good option for applying seed. It has advantages in certain situations, as noted above, but it is not a miracle. It requires intelligent care after planting just like dry seeding.
Sodding
Nationwide, sod is the most popular method of planting new lawns. In the Pacific Northwest, it is widely used for commercial work and in many residential areas. It hasn’t replaced seeding as the standard method here because it is so easy to establish seeded lawns in our climate. The big advantage to sod is that it creates an instant lawn. There is no waiting and fussing over germinating seed.
People often argue the merits of seed versus sod. Practically speaking, it is simply a matter of personal preference. If you want seed, plant seed. If you want sod, plant sod.
When planting sod, remember to put the sod on a carefully prepared seedbed. Moisten the soil just prior to laying the sod down to ensure rapid rooting. Place the green side up, and make sure the edges fit together tightly. There should be no gaps between sod pieces once they are placed on the soil. The pattern is less important than making sure the sod fits tightly at the seams. For many people, the staggered pattern common to brick walls is most appealing, but it really doesn’t matter much.
Even though sod is mature grass, most of its roots were removed when it was cut, so it needs regular watering. Soak it well immediately after planting and water at least daily for a couple of weeks. Pay attention to edges near driveways and sidewalks, since they are prone to rapid drying.
Fertilizing
Apply fertilizer just before or after seeding. If you have two spreaders, one person can put down seed while the other applies fertilizer.
For sodded lawns, incorporate fertilizer into the seedbed prior to final grading or, if planting on fertile soils, wait to apply it after the sod has put down roots. Sod often is prefertilized, so it might grow well for several weeks without preplant fertilizer.
For seeded lawns, you can use nearly any fertilizer that is relatively high in nitrogen (N). Twenty years of class planting projects have repeatedly yielded three consistent responses to fertilizer:
- Fertilizer has no observable effect on initial emergence of the grass seed.
- Nitrogen, either alone or in combination with phosphorus or potassium, stimulates growth after emergence and speeds establishment of the turf.
- Starter fertilizers high in phosphorus offer no advantage over regular turf-grade fertilizers high in nitrogen. Most books emphasize phosphorus and downplay the value of nitrogen. The key to rapid establishment lies in pushing growth after the grass germinates, which is best accomplished with nitrogen.
In most situations for seeded lawns, try the following approach. Apply a complete fertilizer (N-P-K) when you plant at a rate of 1.5 to 2 lb nitrogen per 1,000 sq ft. You can use 15-15-15 if you like, but regular turf-grade fertilizers high in nitrogen and potassium and low in phosphorus (e.g., 10-2-6, 21-7-14, 24-4-12, etc.) are best. Reapply at the same rate about 4 to 6 weeks after planting to further accelerate establishment. These will be the two most important applications you will ever make to your lawn.
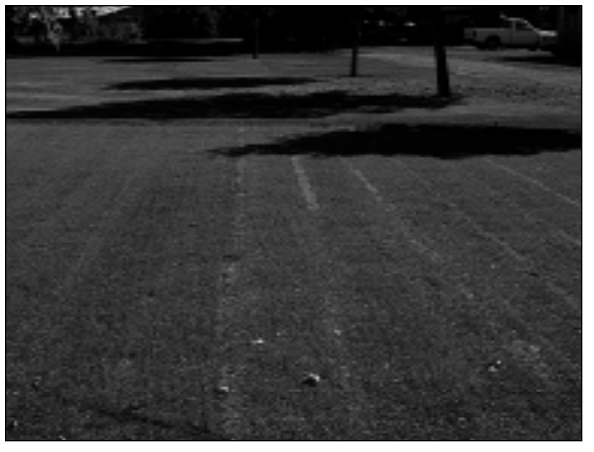
Figure 9 shows a turf area after seed and fertilizer have been applied.
Sodded lawns should be fertilized 4 to 6 weeks after planting or as soon as color and growth begin to decline.

Mulching
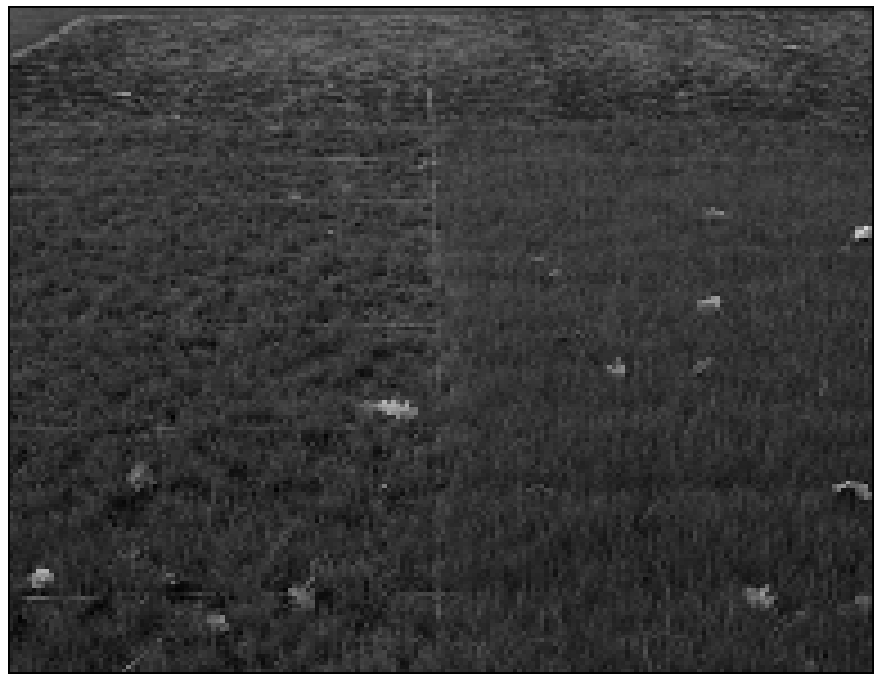
The next step in planting a lawn usually is mulching. Mulch helps keep moisture near the seed during germination. Applied properly and under the proper conditions, mulch speeds germination and improves stand uniformity (Figure 10). It is particularly useful on areas exposed to wind and prone to rapid drying. It also is useful in preventing surface erosion. It can even prevent earthworms from moving seed around in the course of their nightly wanderings.
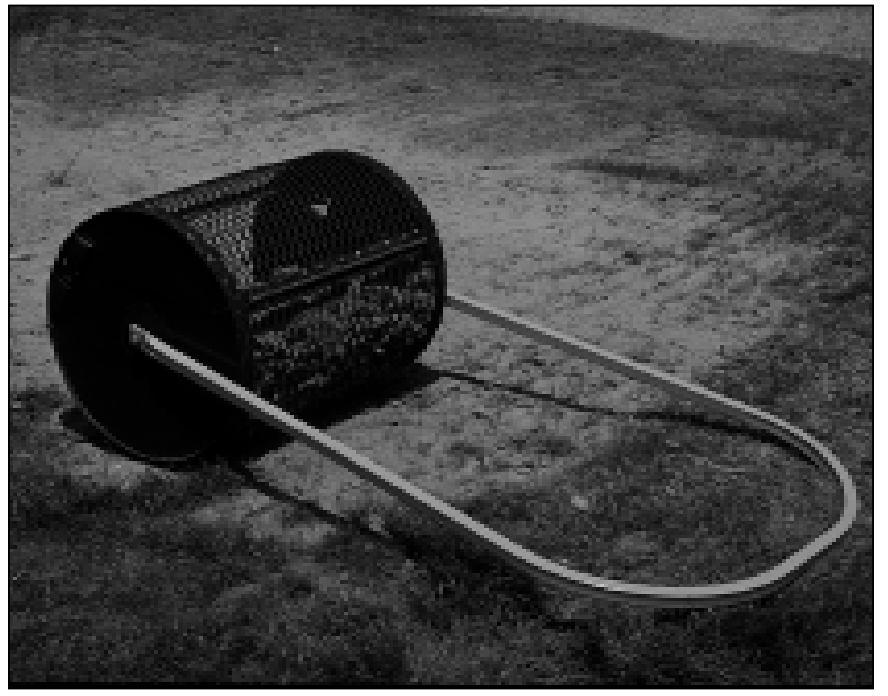
One key when using mulch is to apply it fairly lightly (Figure 11). Make one, or at most two, passes with a mulch roller (Figure 12). You don’t need to bury the seed under 1 ⁄2 inch of mulch; an 1 ⁄8 to 1 ⁄4 inch of mulch generally is perfect. If you apply mulch too deeply, the seed might not be able to emerge through it.
The type of mulch is relatively unimportant, although finer mulches often work better than coarser ones. Fresh sawdust, aged sawdust, fine fir bark mulch, compost, ground-up grass straw, and peat moss can work well.
People often worry that mulches might tie up nitrogen in the soil, but when applied lightly this is not a problem.
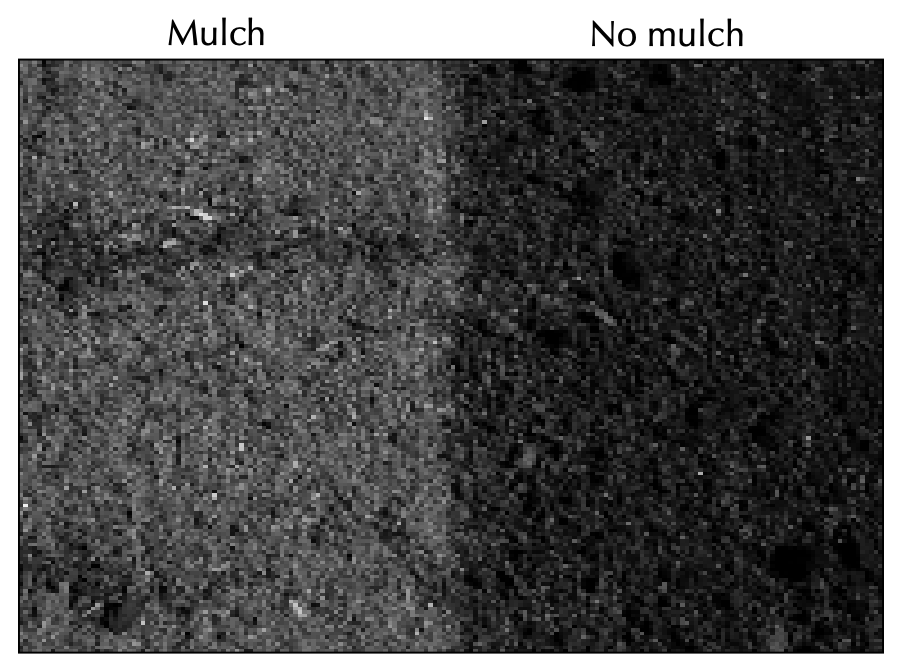
Some dark-colored mulches greatly enhance emergence in late fall. This effect might be due to the fact that the dark mulch absorbs sunlight and raises the soil temperature.
Mulch isn’t always desirable. In late spring, summer, and early fall, mulch can cause surface heating and result in dampingoff diseases or what seems to be heat scorch. In some experiments, mulched summer plantings were lost, while unmulched plantings nearby came up just fine. Summer plantings are tricky because it is hard to keep them consistently moist without mulch, but mulch may lead to disease or heat scorch that can kill seedlings. You can see why it is worth waiting to plant during optimum times.
Mulch has an impact for only a short period of time. While big differences often are observed 2 to 3 weeks after planting, 6 months later it is difficult to tell which areas were mulched and which weren’t. In fact, seed applied to a wellprepared seedbed and then lightly raked in to ensure good seed–soil contact often does just as well as seed spread on the surface and then covered with mulch.
Considering the extra work and cost involved with obtaining and applying mulch, it might not be as important as we often think. The real issue isn’t the intrinsic value of mulch but rather keeping the seedbed moist enough for rapid and uniform germination. Good seedbed preparation, followed by light raking and careful irrigation, will accomplish this goal. Since careful irrigation is not always possible, most people find that mulch is a simple insurance policy.
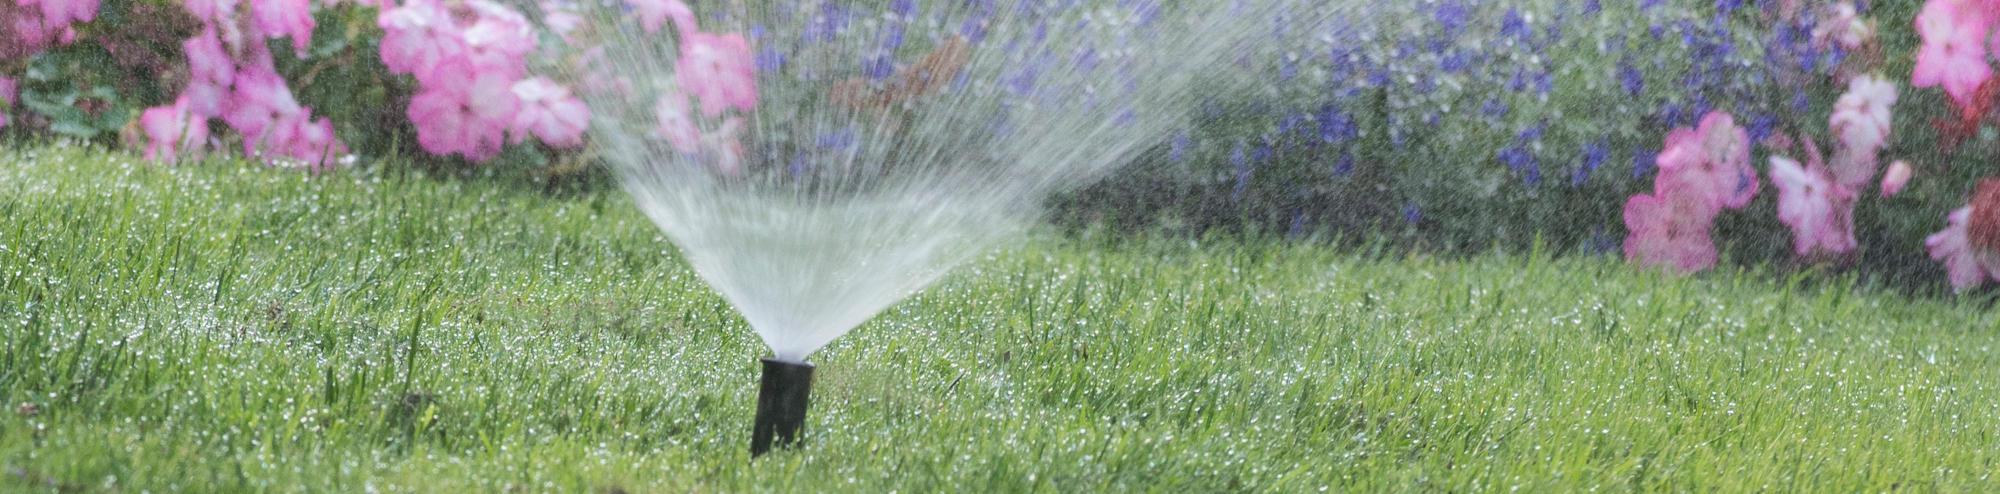
Irrigation
The objective when irrigating a newly seeded lawn is to keep the seed wet so it can imbibe water and begin the germination process. You can’t do this by giving the area one thorough soaking. The best way is to irrigate two to four times each day for as long as it takes the surface soil to start to glisten. On heavy-textured soils, this might mean 5 to 15 minutes per irrigation. Generally, it takes longer the first day. By day 2 or 3, the soil glistens shortly after you start to water. If you keep the soil moist but not water logged, most grasses will germinate in 5 to 10 days at optimal temperatures (Figure 13).
During the germination period (about a week), you need to make sure the site gets water at the right time and in the right amount. Normally, you can’t depend on rain, so be prepared to do some babysitting. Also keep in mind that although the seedbed needs constant moisture, it makes no sense to drown the area. If the site puddles during irrigation and stays that way for more than a few minutes, you are watering too much.
After the grass germinates and green shoots are visible over most of the area, reduce the number of irrigations per day (for example from 4 to 2) and by the end of the second week to once per day. In the third week, you should be able to irrigate once every second or third day depending on the weather. By the fourth week, you often can reduce irrigation to 1 to 2 times per week. From then on, let the lawn tell you when it needs water, and irrigate accordingly.
Sod should be watered thoroughly just after planting and then at least daily for the first couple of weeks. Avoid overirrigating by randomly lifting sod corners to observe soil moisture and rooting progress. Remember to check a different piece each time you look.

Mowing
Mow the new turf as soon as there is enough grass to cut (Figure 14). Often, if the weather is good and you have done everything properly, the lawn will need mowing about 3 weeks after planting. Mow at the height you intend to maintain the lawn. For perennial ryegrass–fine fescue lawns, mow at about 2 inches. To prevent rutting, stop irrigation a day or two before mowing to let the soil surface firm up. Remember, you didn’t do all that grading just so you could ruin the surface by mowing when the soil is too wet!
Aftercare
Now the lawn is up, it has been mowed once, and it soon will be ready for regular weekly mowing. At this point, many people wonder why their new lawn is turning yellow. Remember, it is time to fertilize again. Young lawns are hungry and might need fertilizer every 4 to 5 weeks the first fall and following summer. By the time they are a year old, most lawns hold color longer after each fertilizer application and begin to require less intensive fertilization.
Renovating old lawns
Renovation refers to improving existing lawns by overseeding. Optimal timing for renovation is the same as for starting a new lawn.
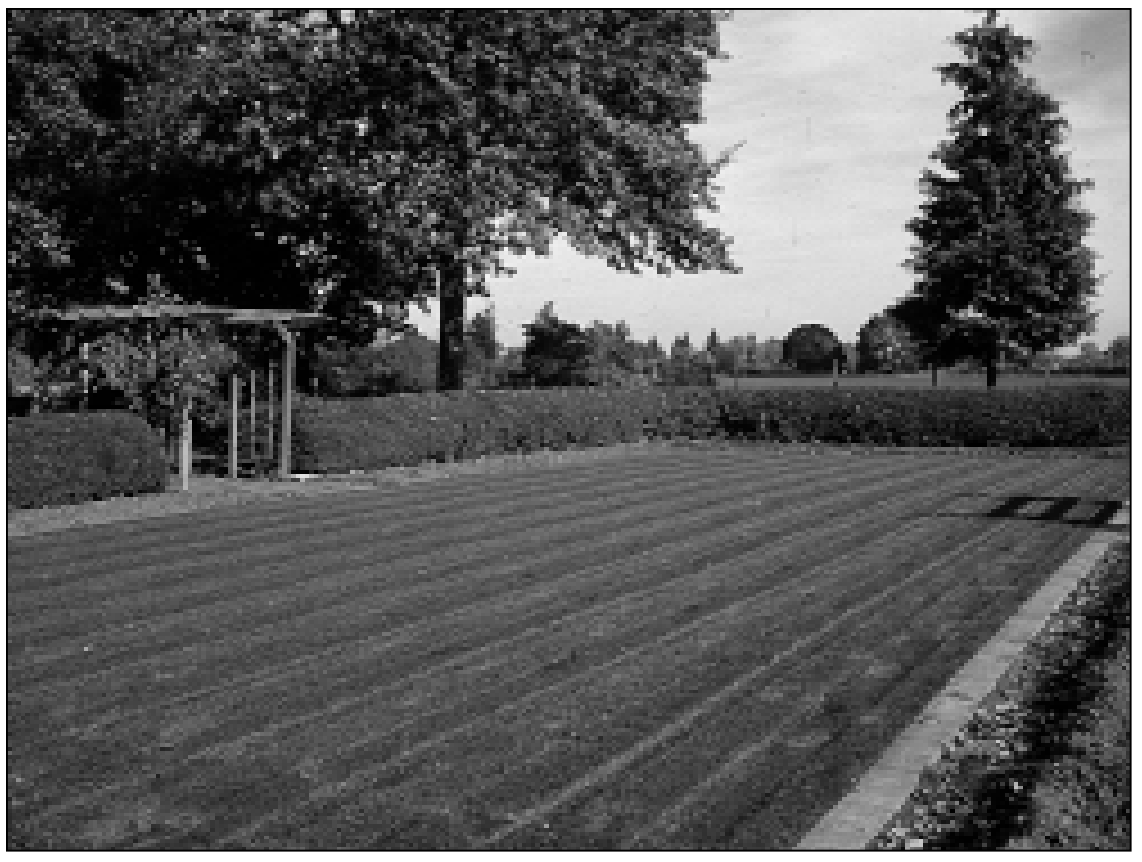
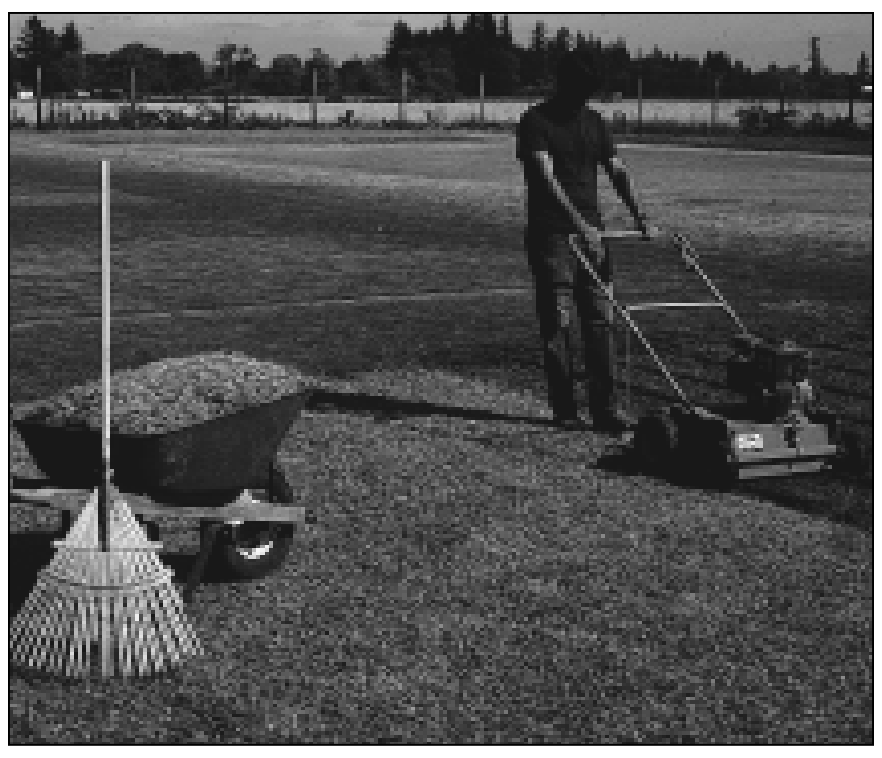
Renovation often involves killing the existing lawn, dethatching, minor surface grading, and reseeding (Figure 15). In general, renovation does not involve rototilling, so it is less disruptive and more convenient in existing landscapes. What you do will depend on the condition of your lawn and your goals for the renovated lawn. Here are three common situations where homeowners often consider renovation.
Neglected, weed-infested lawns
You just bought a house and the former owners didn’t take care of the lawn. The turf is patchy, and there are broadleaf weeds everywhere. It looks hopeless, and it seems like renovation is the only answer.
Most lawns like this can be saved with only modest effort and do not normally require renovation. If the basic grass cover is adequate, this type of lawn might improve dramatically just by treating broadleaf weeds with selective weed killers, dethatching existing grass, and following up with an application of nitrogen fertilizer to stimulate grass growth. Mowing regularly and irrigating enough to maintain a dense turf usually completes the conversion to a healthy lawn.
Partially dead lawns
If part of your lawn was smothered by a stack of roofing or plywood from your remodel project or the kids or dogs wore out the turf from too much play, renovation is the easiest way to get it back in shape. Rent a dethatching machine and set it low enough to break up and loosen the soil. Go over all of the affected areas or even the entire lawn until it looks pretty much like bare soil (Figure 16).
If the soil is severely compacted, rent a core aerifier machine and go over the lawn several times after dethatching to open up the surface and relieve compaction. After coring, go over the lawn one more time with the dethatcher to break up the debris left by the coring machine. Once you remove unwanted debris, you are ready to seed.
Apply seed and fertilizer as you would for a new lawn, and mulch the seeded area lightly with peat moss, sawdust, compost, or other material. Once seeded, treat the lawn just as you would a newly seeded lawn.
Lawns with patches of invading grasses
Most of the grasses we plant in new lawns are dark green. After a few years, you probably will notice lighter green patches of indigenous grasses invading the lawn. If you do nothing, the lawn eventually will be taken over by these grasses and will become what is known as a climax lawn. While there is nothing wrong with climax lawns, many people prefer pure stands of perfect grass. At this point, they decide to renovate their lawn.
It is almost impossible to successfully renovate a lawn with the goal of producing a perfect monoculture of planted grass. The key is to make sure you kill the existing grasses completely. This cannot be done by a single spray of a nonselective herbicide.
To begin, quit mowing the lawn for a few weeks in the fall. Spray a nonselective herbicide and wait to see what level of kill you get. Treat again in early spring and wait for signs of regrowth. About early to mid-May, treat again and then dethatch and overseed as described previously. Try planting perennial ryegrass at about 10 lb of seed per 1,000 sq ft. After mulching and fertilizing, irrigate and watch the grass start to grow. Generally, within a year, the lawn will look just like it did before the renovation.
If this sounds futile, it is! The problem is that it is almost impossible to kill all grasses with available herbicides. Even if you could, there always is plenty of seed in the soil to germinate and reinvade the lawn. Herbicides that might help in this quest are not readily available to homeowners, and even when used do not guarantee success.
General thoughts on renovation
Renovation is a useful tool for improving weak lawns or those with damaged areas. It generally does not produce perfect lawns that are genetically pure.
Just as with planting new lawns, the key is to prepare a good seedbed and make sure there is good seed-to-soil contact. The easiest way to do this is by mulching after seeding. Timing for planting is the same as for new seedings. Grass often is slower to develop on renovated sites but eventually will produce excellent turf.
A renovated lawn requires regular maintenance to protect your investment.
To learn more:
- Conserving Water in the Garden and Landscape, EC 1531
- Managing Moss in Lawns in Western Oregon, EM 9176
- Fertilizing Home Lawns, EC 1278
- Maintaining a Healthy Lawn in Western Oregon, EC 1521
- Necrotic Ring Spot on Turf in Oregon, EC 1462
- Turfgrass Seeding Recommendations for the Pacific Northwest, PNW 299
Some cultivars of common turfgrasses suited to Oregon
Perennial ryegrass, Lolium perenne
Thirty years of breeding and selection work with ryegrasses have produced hundreds of improved cultivars. All of the grasses in this list are fairly fine textured, medium to dark green, and cut cleanly even with a power lawnmower. They can be mowed as low as 3 ⁄4 inch and perform very well at 11 ⁄2 to 2 inches. All ryegrasses need regular nitrogen fertilizer applications to maintain color and density.
All ryegrasses are susceptible to red thread disease, but many are resistant to winter brown blight disease. In areas where snow cover occurs for extended periods, all ryegrasses will suffer from snowmold diseases unless treated with fungicides in fall before snowfall.
In field trials where cultivars are planted side by side, the only visible differences are in color. Turf quality is almost identical for all cultivars.
Acceptable perennial ryegrass cultivars and blends
- Accent
- Achiever
- affirmed
- Alliance*
- All Star II
- Amazing
- Applaud
- ASP 400
- Brightstar II
- Caddieshack
- Calypso II
- Catalina
- Cathedral II
- Celebration
- Champion GQ*
- Charismatic
- Churchill
- Citation III
- Cutter
- Dandy
- Delaware Dwardf
- Dimension
- Divine
- Elf
- Elfkin
- Elite
- Exacta
- Fiesta III
- Gator III
- Headstart
- Jet
- Kokomo
- Laredo
- Low Grow II
- Majesty
- Manhattan 4
- Manhattan II
- Mardi Gras
- Medalist Gold*
- Night Hawk
- Nobility
- Northstar
- Palmer III
- Panther
- Paragon
- Peal
- Pebble Beach
- Pennant II
- PhD*
- Pinnacle
- Pinnacle II
- Pizzazz
- Pleasure
- Precision
- Prelude III
- Premier II
- Prizm
- Pro Tour Blend*
- Promise
- Protocol
- Radiant
- Rebound
- Seville II
- SR 4200
- SR 4400
- SR 4500
- Stallion Select
- Stallion Supreme
- Statesman II
- Stellar
- Sunshine
- Top Hat
- Vivid
- Wizard
* - Contains a blend of several cultivars
Fine fescues, Festuca sp.
Fine fescues include numerous species, all of which are fine textured and very dense-growing. In Oregon, Chewing’s fescue produces a tight, dense turf that is very attractive. Hard fescue and strong creeping fescue produce a slightly coarser turf that also is very attractive.
All have low nitrogen fertilizer requirements and, when planted with other grasses, generally dominate the planting in about 3 years. Fine fescues tolerate mowing between about 1 to 2 or 2 1 ⁄2 inches.
Historically, fine fescues have been key components of shade mixtures. In western Oregon, they generally do not persist in shade due to damage from several winter diseases. In drier parts of the state, they perform well in shade. Fine fescues probably are best used in shade mixtures in central and eastern Oregon.
Hard and strong creeping fescue are quite drought-tolerant when stands are young. As stands age and thatch accumulates, drought tolerance declines significantly because roots grow in thatch and not in the soil.
Strong creepers, slender creepers, and most Chewing’s fescues are susceptible to red thread disease, while hard fescue generally is highly resistant. The biggest drawback to using fine fescues for turf is excess thatch and poor recovery from mechanical dethatching.
Aceptable fine fescue cultivars
Chewing's fescue
- Banner II
- Banner III
- Bridgeport
- Brittany*
- Culumbra
- EcoNordic
- Jamestown II
- Sandpiper*
- Shadow II*
- SRT 5100
- Tiffany*
- Treazure
- Victory*
- Victory II*
Hard fescue
- Aurora
- Brigade
- Defiant*
- Discovery*
- Ecostar*
- Osprey*
- Reliant II
- Spartan*
- SR 3100
- SR 5000E
- Vernon
Strong creeping
- Florentine*
- Flyer II
- Jasper
- Jasper II
- Shademaster II*
Slender creeping
- Dawson
- Seabreeze
* - Performed well in National Turfgrass Evaluation Program shade trials.
Tall fescue, Festuca arundinacea
Breeding work with tall fescue has changed this once coarse, rank grass into a fairly dense, medium-textured grass with reduced vertical growth. It still is coarse when compared to other commonly planted turfgrasses, however.
Tall fescue does well with medium levels of nitrogen fertilizer and tolerates mowing between 1 to 2 inches. In OSU trials, it looks best when mowed at 1 and 1/2 inches. Tall fescue does not produce much thatch.
Tall fescue tends to have poor winter color in western Oregon. It can tolerate a fair amount of shade but also thrives in hot, sunny locations. During extended drought, it stays green 1 to 2 weeks longer than most other turfgrasses. It is best planted alone and should be planted more widely in central and eastern Oregon. In irrigated lawns in western Oregon, it tends to be invaded and rapidly outcompeted by indigenous grasses. Tall fescue in western Oregon probably is best suited for sites receiving little or no irrigation and where turf quality is not important.
Tall fescue gets several diseases in western Oregon, which can cause significant winter thinning. Snowmold can be a problem east of the Cascades where extended snow cover is common.
Acceptable tall fescue cultivars
- Airlie
- Alamo
- Anthem II
- Apache II
- Arabia
- Arid II
- Arid III
- Arizona
- Axiom
- Aztec II
- Bandana
- Barlexas II*
- Barlexas*
- Barrera*
- Barrington*
- Bingo*
- Bonsai II
- Brandy
- Bravo
- Bulldawg
- Cochise II*
- Coronado
- Coronado Gold
- Cortez*
- Coyote
- Crewcut II
- Crossfire II
- Dominion
- Durana
- Duster
- Dynasty
- Empress
- Equinox
- Falcon III
- Gazelle
- Houndog 5*
- Jaguar III
- Laramie*
- Lion
- Masterpiece
- Matador*
- Millennium*
- Mustang II
- Ninja*
- Olympic Gold
- Oncue
- Pixie
- Plantation
- Rebel 2000
- Rebel Sentry
- Red Coat
- Regiment
- Rembrandt
- Reserve*
- Scorpio
- Shanandoah
- Shortstop II
- Southern Choice
- SR 8210
- SR 8500
- SR 8600*
- SunPro
- Tar Heel
- Tomahawk
- Tracer
- Tracer*
- Tulsa
- Tuscany*
- Twilight II
- Velocity
- Watchdog*
- Wildfire*
- Wolfpack*
- Wyatt
- Zanzibar
* Starred cultivars were rated in Corvallis. All others are based on ratings in the National Turfgrass Evaluation Program.
Kentucky bluegrass, Poa pratensis
There are hundreds of Kentucky bluegrass cultivars, and many produce outstanding turf. In recent years, the spread of necrotic ringspot disease has made disease resistance a factor when recommending cultivars. The cultivars listed below seem to have enhanced resistance to necrotic ringspot disease based on their performance in the National Turfgrass Evaluation Program (NTEP) trials or in other regional trials. In western Oregon, rust and leafspot diseases also can cause significant turf thinning.
In general, Kentucky bluegrass is best adapted to central and eastern Oregon, but it can be used in western Oregon in mixtures with perennial ryegrass. It needs regular nitrogen fertilizer to remain competitive. Optimum mowing heights range from 3 ⁄4 to about 21 ⁄2 inches.
Kentucky bluegrass’s biggest problem, other than necrotic ringspot disease, is excess thatch production. It should be dethatched every year or two, starting the first or second year after planting. In central Oregon where lawns generally are not dethatched, thatch can accumulate to a depth of 8 inches. Heavily thatched lawns require significantly more water to stay green than do lawns with little thatch.
Apparent necrotic ringspot-tolerant cultivars*
- Abbey
- Allure
- America***
- Apollo***
- Award
- Baronie
- Brilliant***
- Caliber
- Challenger
- Champagne
- Chateau
- Dragon
- Eclipse
- Fortuna
- Haga***
- Impact
- Jefferson
- Langara***
- Liberator
- Midnight
- Moonlight
- Nuglade
- Nustar
- Odyssey
- Princeton 105
- Quantum Leap
- Rugby II
- Seabring
- Showcase
- Sidekick
- Sodnet
- SR 2000
- SR 2284***
- Total Eclipse
- Unique***
- Wildwood
Others:**
- Adelphi
- Cynthia
- Mystic
- Somerset
* Based on resistance ratings for necrotic ringspot disease in 1996-2000 National Turfgrass evaluation Trial.
**Based on regional field trials
***May be better suited to western Oregon than other bluegrasses. For more information, consult the National Turfgrass Evaluation Program.
Bentgrasses, Agrostis sp.
Bentgrasses rarely are planted in Oregon, but generally dominate old lawns throughout western Oregon. They are well adapted in western Oregon because they grow well from fall through spring, persist well under low fertility, and produce very dense turf that competes well with other grasses. They are one of the most common contaminants in lawns planted with other grass species, and they quickly dominate once they invade.
All bentgrasses look best and perform best when mowed short. The optimum mowing height is about 1 ⁄2 to 1 inch, with acceptable turf being produced as high as 11 ⁄2 inches. When mowed at 2 inches or above, bentgrass develops false crowns and looks scalped after every mowing from about midsummer on. Bentgrasses produce a light, fluffy thatch that should be removed annually or every other year in early to late spring.
On mature lawns, the only potentially severe disease is fusarium patch, which occurs in most winters. To look green in summer, bentgrass requires regular irrigation. It survives quite well without irrigation, but will turn brown and go dormant by the middle of July in most years. Of available bentgrasses, colonial bentgrass produces higher quality turf than dryland bentgrass, particularly at higher mowing heights.
Some available bentgrass cultivars
Colonial bentgrass
- Bardot
- Sefton
- SR 7100
- Tiger
- Tiger II
Dryland bentgrass
- Exeter
- Highland
- Trust 55